Wednesday, December 12, 2012

Pumpkin Cheesecake Puffy Cups

Here's something which I made very recently for a bake sale we were having at work, and the popularity of which took me completely by surprise. I originally made these in the form of galettes (round, flat pastries with a cheesecake center), but the super-puffiness of the galette with cheesecake at its heart was a little too flaky for my liking, so I decided to try an alternative presentation.  I liked it this way much better -- not only was it more compact, so the pastry dough didn't get as dry and overly-flaky, but the look is quite unique, which always appeals to me. ;) Since puff pastry can be found in the freezer section and does not necessarily have to be made from scratch (you can try to do it yourself, if you've got the time & patience...and I have neither), you'll have to set it out to thaw well in advance.  But believe me when I say that you will look like a genius or a culinary master if you've never used puff pastry before and use it for this recipe.  People will be so impressed with you!  ;)  The pre-made pastry makes this a super-easy recipe, and one that can be made in parts, the first part well ahead of time.  (Especially handy when dealing with lack of time during the day of a big event in your life!)  In my opinion, the hardest part of this whole process was removing the puffs from the muffin tins without completely destroying the pastry if it gets stuck to the sides of the muffin well.  Also, it is worth noting that you will need to use large/jumbo muffin tins, not small ones, containing 6 muffin wells.  The smaller muffin tins simply will not be big enough in this case.


Ingredients:
1 8-oz brick softened cream cheese (can be reduced fat)
1 stick butter, softened to room temperature
½ C sugar
C brown sugar
½ can (about 7 oz) mashed pumpkin
2 tsp pumpkin pie spice
1 Tbsp flour
1 tsp salt
1 tsp vanilla
3 puff pastry sheets
Decorative sugar and extra pumpkin pie spice for garnish
Powdered sugar

Directions:
Take puff pastry out of freezer and place on counter at least 1 hour ahead of any other preparation so it can thaw and soften up.  With a stand mixer, cream butter, sugars, salt, and vanilla together.  Add cream cheese and beat until well-incorporated.  Add mashed pumpkin, pumpkin pie spice and flour.  Continue beating until well-blended, scraping down sides of bowl and beater as needed.  Pour mixture into an air-tight container and place in refrigerator to chill. (Can be made up to 3 days in advance.)

Preheat oven to 350°F.  Spray the individual wells of two muffin trays with cooking spray.  Lay puff pastry sheets out on parchment paper laid out on a flat surface.


Take a pizza cutter or knife and divide sheet into 4 even squares.  


Take each square and place into muffin cups. Corners hanging out are OK.  


Liberally sprinkle pumpkin pie spice over puff pastry dough.  Take cheesecake mixture out of the fridge, and using a small scoop (½ oz), drop a generous scoopful into each well.  When finished, sprinkle decorative sugar over the edges of each pastry.


Stick muffin trays into the oven and bake for 20-25 minutes, or until edges are puffed up and are golden brown. Remove from oven. (Cheese centers will puff up during baking, but then completely collapse once removed from the heat, just FYI.)


When completely cooled, remove puffs from muffin tins and generously sprinkle with powdered sugar.  Serve.  Can be stored overnight without refrigeration for one night.


Makes 1 dozen cups.

~~~~~
GBAdams
12/12/2012

Monday, December 10, 2012

Roasted Butternut Squash & Bacon Soup


Roasted Butternut Squash & Bacon Soup
This is a soup that took me 2 tries to get it right.  My first attempt was below pathetic--the soup was watery and thin, and it was definitely not pureed enough.  I also was highly dissatisfied with the flavor.  When I posted about this on Facebook, many of my friends offered their suggestions, one of which was adding cream cheese to the soup, something I admit I hadn't even considered.  I shelved that suggestion to the back of my mind for the next time I would try to make this soup.  After catching a cooking show where they roasted an acorn squash with shallots and garlic inside, I was inspired to try again. So here is a record of that second attempt.  It turned out way BEYOND my expectations.  Let's just say the way my house smelled while the squash was roasting was nothing compared to how well this soup turned out.  I loved how the roasting brought out the sweetness of the butternut squash without adding any sugar whatsoever to the mix.  And, need I say it, the bacon improved the recipe on the whole to a level I could not have imagined.  Bacon really does make everything better! LOL. I hope you enjoy this soup as much as me & my family did...


Ingredients:
1 whole butternut squash
8 slices of thick-cut bacon
8-10 whole, peeled cloves of garlic (do not chop)
4-5 peeled shallots
2-3 Tbsp olive oil (I prefer the light-tasting variety to extra-virgin)
4 C Chicken broth
1 pkg (8 oz) cream cheese (can use reduced-fat)
1-2 Tbsp kosher salt, depending on taste
1 tsp coarse ground black pepper
1/2 C shredded cheese for garnish, such as swiss or gruyere
Chopped parsley, also for garnish (can be dried)

Squash, bacon, shallots and garlic, ready for the oven
Directions:

Preheat oven to 425°F. Roughly dice bacon slices; set aside.  Slice shallots and set those aside.  Peel & chop de-seeded butternut squash into small, roughly 1-in cubes. Make sure cubes are somewhat equal in size so they roast evenly.  In a large bowl, combine squash, bacon, garlic and shallots. Add olive oil, salt and pepper to taste. When entire mixture is seasoned, pour and evenly distribute onto large, flat, shallow pan, such as a 1/2 jelly roll sheet.  Roast in the oven for 45 minutes, or until the squash has started to brown on the edges and the bacon has mostly crisped up. Remove from oven.  Set aside a few browned shallots rings and bacon bits to reserve as garnish for serving and let the rest cool.


In a large saucepot, bring chicken broth up to a simmer on medium-high to high heat. While broth is heating up, place entire contents of roasting pan into a food processor and purée until all the pieces have been puréed relatively well.  (There might still be little bacon bits visibly floating throughout purée; this is ok.)

Roasted squash mixture, puréed in a food processor.
Add purée to chicken broth and stir well; a whisk is recommended.  Lower heat to medium and add cream cheese.  Whisk further until cream cheese is well incorporated. Remove from heat.


Ladel soup into bowls.  Garnish with crisped shallots & bacon; can add shredded cheese as well.


Makes 4-6 servings

~~~~~
GBAdams
12/09/2012

Tuesday, August 14, 2012

Easy Dinner Potatoes


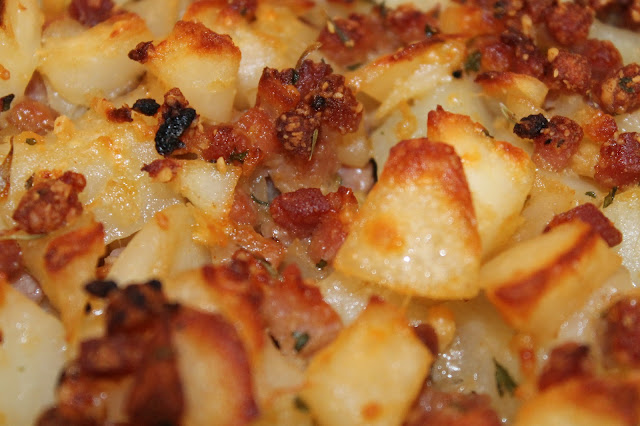
Here's a recipe I threw together out of desparation. We had just come back from vacation and things were still chaotic, but I was tired of take-out, so I whipped this recipe up so as to avoid ordering out yet again. An added bonus: even though the cooking time is not quick, I consider this to be one of my "easy" dishes, because the main part can be already prepared for you in the form of the diced fresh potatoes. (On this particular day, I used diced prosciutto that was also pre-packaged.)  So prep time is at a minimum...but your house will smell so good as it bakes that your family will think you slaved over this dish! ;)

Enjoy!


1 pkg (20 oz) Simply Potatoes brand Diced Potatoes with Onion
1 tsp Worcestershire sauce
2-3 cloves (1 Tbsp) garlic, finely chopped
1 Tbsp parsley
1 Tbsp thyme
1 Tbsp paprika
2 tsp kosher salt (or to taste)
½ tsp coarse ground black pepper (or to taste)
2-3 Tbsp canola oil
C parmesan cheese
3-4 oz finely chopped pancetta (or diced regular bacon or prosciutto)


Combine spices in a small bowl; set aside.  In a medium bowl, combine potatoes with canola oil. Mix well so that all the potatoes are coated. Add garlic, then spices.  When potatoes are evenly coated with spices, add parmesan cheese, stirring again, then the pancetta.

Spray the bottom of a 9x9-in glass pan with cooking spray, then spread potato mixture evenly in pan. Bake at 375°F for 45 minutes; if tops are not nicely browned, broil on low for an additional 5 minutes.  Potatoes are done when the ones in the middle are fork-tender.


Makes 8-10 servings.

~~~~~~
GBAdams
08/13/2012

Sunday, April 22, 2012

Cheesy Hash Browns


Here's a really easy, cheesy hash brown recipe that I made up as I went along.  Adjust the spices to your taste...ours was on the warm-ish side without being too hot.  The Worcestershire also adds a flavor dimension that is not normally present in regular, ordinary hash browns.  Quite tasty, and I was really happy with the outcome.  Added bonus - since I don't use any flour in this recipe, it is definitely gluten-free.  :)

Enjoy!  :)


Hash Browns

Ingredients:
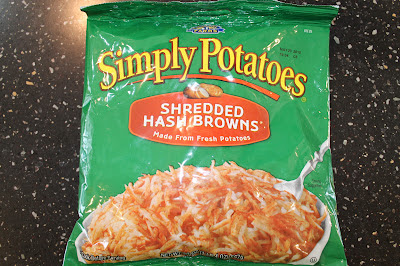
1 20-oz pkg of shredded hash brown potatoes
2 C shredded cheddar cheese (or whatever blend you prefer)
1 C milk
1 Tbsp garlic powder
1 Tbsp onion powder
¼ tsp white pepper
½ tsp black pepper
1 tsp salt
1 tsp paprika
1 tsp Worcestershire sauce


Directions:
Preheat oven to 425° F.  In a bowl, combine spices, milk, and Worcestershire sauce.  Add potatoes and cheese and combine well.  (Potatoes will absorb much of the liquid.)  Spray the bottom and sides of an 8x8 glass baking dish with cooking spray.  Spread potato mix evenly into glass dish. Place on the lowest rack of the pre-heated oven. Bake for 30 minutes at 425°, or until top is golden brown & bubbly.

The potato mix, ready to go into the oven...

...and afterward, all golden bubbly.  :)


Shot of the hashbrowns, taken with my camera phone, after we dove in. ;)

Makes 8-10 servings.

~~~~~~
GBAdams
04/22/2012


Monday, April 9, 2012

Crock Pot Roasted Chicken

This recipe is perfect for the family who spends most of their day out of the house, such as a working couple with kids.  It's perfect because you can prep this dish, place it in the slow cooker, and go about the rest of your day, even if it's a long one.  When you get back, a perfectly roasted chicken will be waiting for you.  Of course, even if you spend the day in your home, you can make this dish...just no guarantees that the aroma as it cooks through the day won't drive you crazy!  ;)

When prepping this dish, be sure to place the roaster breast-side down.  That way the breast becomes immersed in its own juices as it cooks and doesn't dry out.  With such a lengthy cook time for the dish, this little detail is very important. ;)  You can also prep the chicken with the rub the night before and place the whole thing (crock pot and all) in the fridge. Take pot out at least 15 minutes before plugging it in and turning it on.  Because this recipe calls for a low heat, it should gently warm up the stoneware and not risk cracking it.

Hope you enjoy!


Ingredients:
1 whole chicken
Chicken Rub spice mix
1 Tbsp finely minced garlic

Chicken Rub ingredients:
¼ C brown sugar
1 Tbsp Kosher salt
1 Tbsp garlic powder
½ Tbsp paprika
1 tsp tarragon
½ tsp coarse ground black pepper

Directions:
Rinse & pat-dry a whole chicken.  (Don't forget to remove any giblets or innards from inside the cavity!)  Rub about a third of the spice mix on the inside of the chicken as thoroughly as possible.  Rub another third of the spices on the breast side, making sure to cover all crevices and surfaces, especially between the legs, thighs, wings and the body of the chicken. Place breast-side down in a crock pot.  Sprinkle remainder of spices on the back and over any un-touched surfaces. Spread minced garlic over top and massage it and the spices well into the skin of the chicken.

Cover tightly with crock pot lid.  DO NOT add any water or other liquid (such as chicken broth) to the pot.  Turn crock pot on low and let cook, undisturbed, for at least 10 hours.


Caution: chicken will be fall-off-the-bone tender when you're done!  ;)

See?
Serve with roasted or pan-sauteed vegetables, such as honey-butter baby carrots or Cripsy Smashed Potatoes.


*grin*

~~~~~
GBAdams
04/04/2012

Monday, April 2, 2012

Not-From-Scratch Homemade Cinnamon Rolls

This recipe just came to me because I had a hankering for cinnamon rolls, but didn't have any pre-made cinnamon roll dough in my fridge, just plain crescent roll sheet dough.  As it turned out, they were very yummy and relatively simple to make, and this is an excellent way to get "homemade" rolls while skipping a few steps along the way (i.e. making the dough from scratch, letting it rise, etc.). Enjoy...  :)


Ingredients:
Cinnamon Roll Dough - 
1 tube Pre-made crescent roll dough (continuous sheet is best, but can use perforated kind)
2-3 Tbsp margarine or spreadable butter
½ C brown sugar
 C granulated sugar
3 Tbsp cinnamon
pinch nutmeg
½ tsp salt
1 tsp vanilla
½ C finely chopped pecans (optional)


The dough I had sitting in the fridge that I started with

Simple Icing -
2 Tbsp milk
¾ C powdered sugar
½ tsp vanilla

This is the brand of spreadable butter I used, but you can use whatever suits you.

Directions:
Blend ingredients for Simple Icing until smooth. Pour into air-tight container and place in refrigerator.

Mix sugars, salt, and spices together, eliminating any lumps that might be present (such as with the brown sugar). Add vanilla; mix until liquid has been fully incorporated and there are no discernable lumps.  Divide and place half into an airtight container to be used later.

The cinnamon sugar mixture, right after I incorporated the vanilla.

Lay out a sheet of plastic wrap, long enough to completely encompass the full length of dough.  Take dough out of tube; carefully unroll onto plastic wrap.  (If using tradtional crescent roll dough, use extra care that the unrolling does not make the perforations larger.) "Fix" any holes in the dough by gently pressing the dough together to seal the holes.  Using a soft/flexible spatula, liberally spread margarine over entire dough surface.  Take cinnamon sugar mixture and spread as evenly as possible over the margarined surface; use your hands if needed to make the spread cover the margarine. Spread the sugar mix as thick as possible.  Do not skimp on this part - the thicker the cinnamon sugar layer, the better.  If adding pecans, sprinkle over sugared surface at this point. Carefully, and as tightly as possible, roll the dough, using the plastic wrap to tuck the dough into itself so that it forms a log. If necessary, add another sheet of plastic wrap over the already-wrapped log so that it is completely sealed.  Place flat in a freezer and freeze for a minimum of 1 hour to firm up.

The dough rolled out a little crooked, but it tasted just fine in the end. ;)

Once dough is frozen, preheat oven to 375°F.  Lightly spray bottom of 7"x11" (or similar size) glass baking dish with cooking spray.  Remove icing out of the refrigerator to let warm up to room temperature.  Take dough out of the freezer and let rest for 5-10 minutes.  Unwrap dough from plastic, place onto a chopping board or plate and slice roll into 3/4- to 1-in thick slices.  Place slices flat onto baking dish and space evenly (about 1") apart.

Sliced-up rolls, ready for the oven

Bake for 17-20 minutes or until rolls are a dark golden brown color and start to look "dry." Cinnamon should be bubbling at this point.  Remove from oven and let rest for 5-10 minutes.

Just out of the oven

Drizzle icing over rolls and serve warm.


Makes 12 small rolls.

~~~~~~
GBAdams
04/01/2012

Monday, March 26, 2012

Hash Benedict


Here's an alternative to regular Eggs Benedict.  For me, it's easier to time the overall presentation than the traditional way, since I don't have to worry about the english muffins getting overly-toasted, dry, etc.  And for our 2-year old, it's a lot easier to eat, thanks to the hash browns.


Ingredients:
1 pkg shredded potatoes (hash browns)
6 eggs
1 pkg Hollandaise sauce mix
boiling water
2-3 Tbsp vinegar
Canadian bacon (optional)


Directions:
Prepare Hollandaise sauce according to package directions. To make it from scratch, here's a recommended recipe.  Set aside on low heat to keep warm.  Brown potatoes in a frying pan or skillet; use 1 Tbsp canola oil and 1 tbsp butter, or whatever oil desired to keep potatoes from sticking to the pan.  Once potatoes are brown, also set aside on low heat to keep warm.

Prepare poached eggs.  Now that I know how to make them in the microwave, that's the technique I use.  (So easy! Thank you, Foodess!)  You can also learn how to do them the classic way, following these instructions if you've never poached eggs before.  Assemble everything together by layering hash browns on a plate, placing 1-2 poached eggs on top, and smothering with hollandaise sauce. (If adding Canadian bacon is desired, place on the potatoes before placing eggs.)


Makes 4-6 servings.

~~~~~
GBAdams
03/25/2012

Friday, March 23, 2012

Chicken Adobo by Germ

So here is yet another recipe I thought I had already posted on Mélange, but it turns out I was wrong.  I did publish it as a note on my Facebook page, but forgot to replicate it to my blog, once it was created.  Oops!

Filipino Adobo, unofficially known as the national dish of the Philippines, has its roots in Spanish cuisine, but its preparation and flavor is entirely Filipino. Although it also shares a name with some Mexican dishes, they are not the same by any stretch.

This is by no means the only way to cook The Philippines' national dish; this is just how I've prepared it since I was in college. There are so many varieties based on region and preference. Some more spicy, some with more savory elements (like fresh herbs, etc.). However, all share two main, basic ingredients: soy sauce and vinegar. It's the vinegar that sets this dish apart and gives it its unique flavor. I make it with sugar so it ends up a sort of adobo/sweet-and-sour hybrid. Very popular at pot lucks.  You can modify it according to your own tastes, either using less sugar or omitting it altogether.  Just don't take out the vinegar.  ;)


Ingredients:
1 whole fryer chicken, cut up (about 8-10 pieces, depending if you cut up the split chicken breasts)
4-5 cloves garlic, chopped
2-3 white onions, roughly chopped - larger slices
1 Tbsp peppercorns
3-4 Bay leaves
2 Tbsp sesame oil (or enough to barely coat bottom of pan or pot)
1 C soy sauce (use gluten-free variety to make this a GF dish)
1 C apple cider vinegar
1 C sugar
1 C warm water
White sticky rice

Directions:
In mixing bowl or large measuring cup, combine soy sauce, vinegar, sugar and water. Set aside.  In stock pot or dutch oven, heat to medium high, add sesame oil, then add chicken.  Brown one side.  Flip, then add garlic and continue to brown other side.  Add onions, soy sauce mixture, peppercorns and bay leaves.  Bring liquid to a boil, then reduce heat to simmer for a minimum of 15 minutes, or until onions begin to turn translucent.  Serve with rice.


Serves 6-8.

~~~~~~
GBAdams
03/08/2010

Sunday, March 11, 2012

Crock Pot Dr Pepper Carnitas

Here's an easy crock pot recipe that's pretty tasty on the day it's made...and then even better in subsequent days after the spices have had a chance to really marinate in the meat.  My family loves having these leftovers over tortilla chips with cheese ... they make amazing nachos!  ;)


Now that I'm back in the full-time workforce, I'm finding that I'm really getting into different ways of cooking with my crockpot.  Not only from a practicality standpoint, but also due to the quality of the meats when it's all said in done.  (Sooooo tender!)  I love putting a given recipe all together in the morning before I leave for work, and then coming home to a meal, one that's ready to go and has filled our house with the aroma of whatever's been cooking all day long. It's also an easy clean-up meal...one pot to clean, as opposed to multiple pots/pans and/or bowls such as when I create stove-top meals.

One thing I should mention, I've included a picture of the brand/type of spice packet I use in this recipe. I've found that I end up only needing and then using half the packet in a given recipe; I usually end up re-sealing the leftover spices with my Food Saver so that I can use it again for another meal later on.  However, this is subjective and if you feel like you want to use the entire package, that's totally at your discretion.  Regardless of how closely (or not) you follow this recipe, I hope you enjoy the finished product!  ;)


Ingredients
One 3-4 lb package of pork butt or shoulder roast
1 medium to large white onion, thickly sliced
1 14-oz package frozen pepper strips
1 package of carnitas spices
8 oz (1 can) Dr Pepper

medium-sized tortillas (flour)
shredded cheese (cheddar, monterey jack, Mexican blend, etc.)
shredded lettuce
fresh salsa
sour cream
lime wedges


Directions
Rub carnitas spices all over pork roast. If one side has more fat than the others, place that side up in crockpot. Place onions over meat, then pour Dr Pepper over all.

This is how it all looked at 7am, just before I added the sliced peppers and put the lid on.

Add pepper strips. Set crock pot on high and cook for a minimum of 6-8 hours.  Once meat is fork-tender, shred by pulling apart with a fork.  Serve over warmed tortillas with cheese, lettuce, salsa and/or sour cream; garnish with lime wedges, as desired.

This was the end result, after slow-cooking for 10 hours.
It was so tender, I could have separated the meat with my pinky fingers!


~~~~~~
GBAdams
03/06/2012

Thursday, March 8, 2012

Mascarpone Frosting/Filling


This is my new favorite dessert filling/frosting.  I like it much better than a cream cheese frosting, because it doesn't have that sour component.  :)


Ingredients:
1 stick butter, softened to room temperature
¾ C powdered sugar
16 oz mascarpone cheese
1 t vanilla
1 t meringue powder

Directions:
Cream together butter, powdered sugar, and meringue powder until smooth.  Add vanilla and continue to beat. When vanilla is incorporated, add mascarpone cheese and beat for 2 minutes.  Scrape side of bowl & beat again for another 2 minutes, or until all ingredients are well-blended.  Be careful not to over-beat to the point where mascarpone begins to separate.  Can be frosted over cakes or put into pastry bag and piped over cupcakes or whoopie pies.  Refrigerate any unused frosting in an airtight container, up to 1 week.

~~~~~~
GBAdams
03/05/2012