Showing posts with label eggs. Show all posts
Monday, March 26, 2012
Hash Benedict
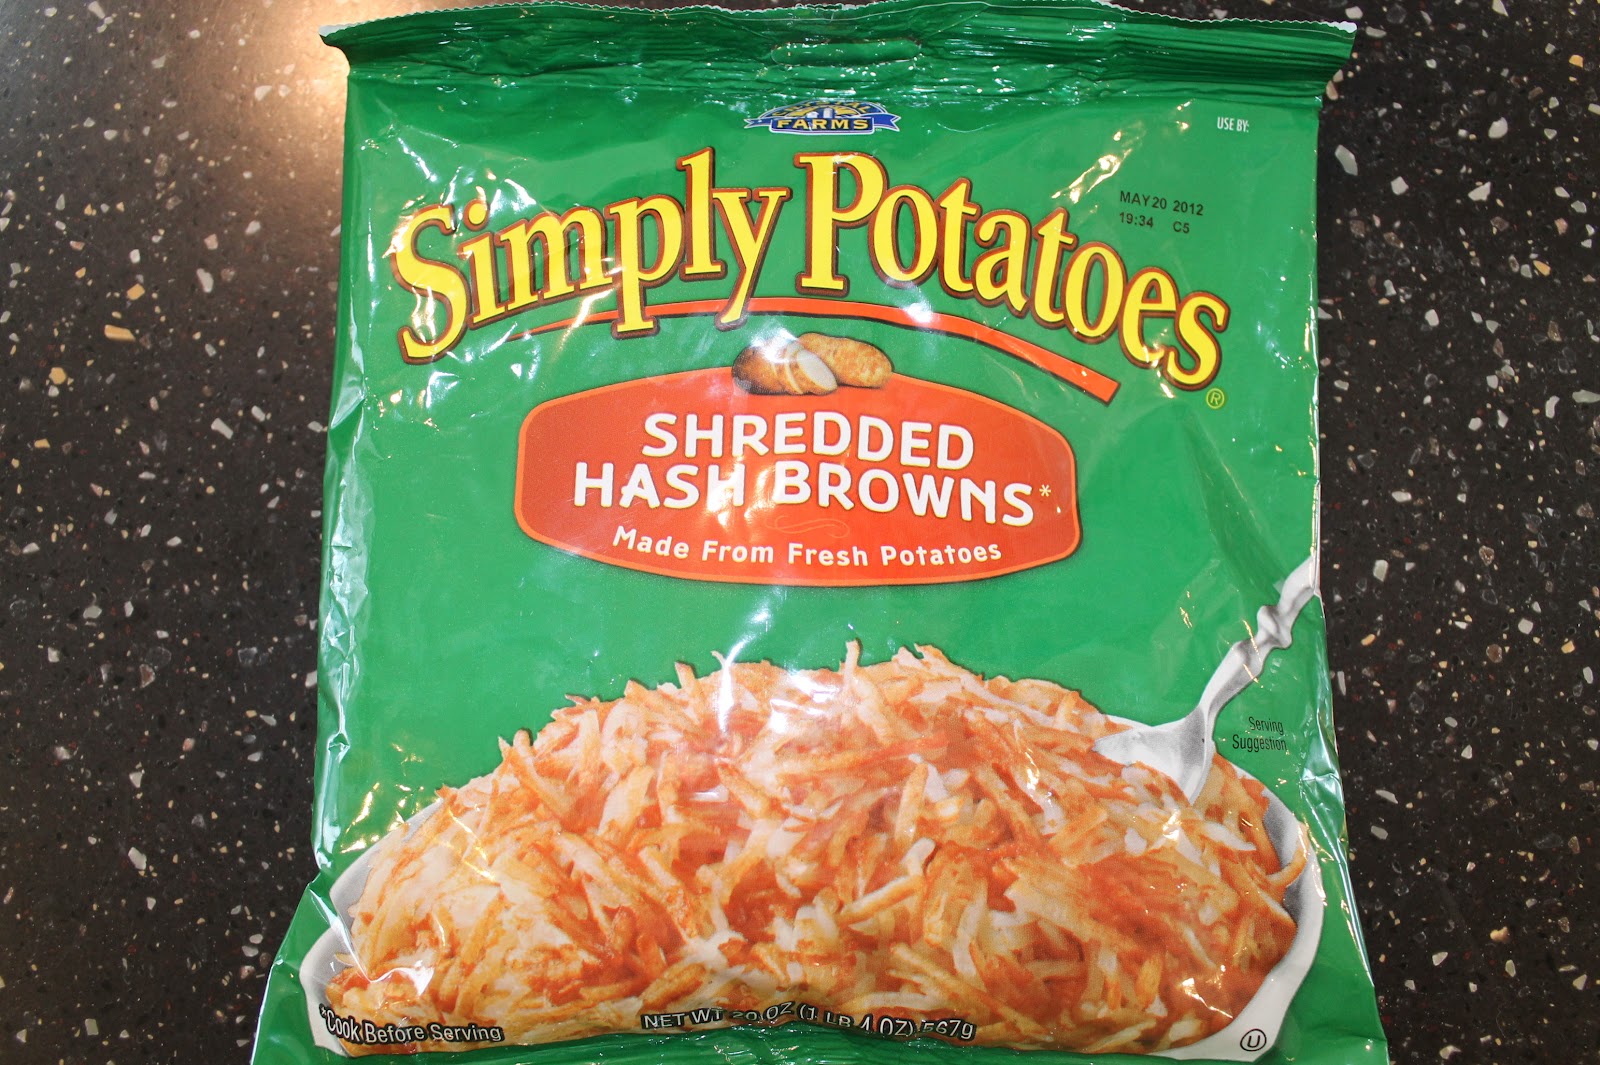
Here's an alternative to regular Eggs Benedict. For me, it's easier to time the overall presentation than the traditional way, since I don't have to worry about the english muffins getting overly-toasted, dry, etc. And for our 2-year old, it's a lot easier to eat, thanks to the hash browns.
Ingredients:
1 pkg shredded potatoes (hash browns)
6 eggs
1 pkg Hollandaise sauce mix
boiling water
2-3 Tbsp vinegar
Canadian bacon (optional)
Directions:
Prepare Hollandaise sauce according to package directions. To make it from scratch, here's a recommended recipe. Set aside on low heat to keep warm. Brown potatoes in a frying pan or skillet; use 1 Tbsp canola oil and 1 tbsp butter, or whatever oil desired to keep potatoes from sticking to the pan. Once potatoes are brown, also set aside on low heat to keep warm.
Prepare poached eggs. Now that I know how to make them in the microwave, that's the technique I use. (So easy! Thank you, Foodess!) You can also learn how to do them the classic way, following these instructions if you've never poached eggs before. Assemble everything together by layering hash browns on a plate, placing 1-2 poached eggs on top, and smothering with hollandaise sauce. (If adding Canadian bacon is desired, place on the potatoes before placing eggs.)
Makes 4-6 servings.
~~~~~
GBAdams
03/25/2012
Monday, December 26, 2011
Challah Bread Pudding
Disclaimer: I am not Jewish. Though I have many, many Jewish friends and pledged a mostly Jewish sorority in college, I am a Catholic-raised Filipino girl. Which means I grew up knowing next to nothing about their culture & traditions. Having said that, I have always held in great respect the Jewish culture, including the foods, even if I wasn't familiar with them. This year I decided to change my perspective by diving in and trying my hand at making some of the traditional foods...or at least, making dishes out of some of the traditional foods. This is one of them. About a month after I first made this pudding, I attempted potato latkes...it took the 2nd try before they were worth mentioning. ;) I've been told my next project should be to learn how to make bagels. ;)
I've always loved egg breads, and of course, when thinking about making a bread pudding, the quintessential egg bread -challah- should always be considered. You can, of course, make this bread pudding with regular bread such as French or Italian, but I like how the pre-pudding shininess of egg breads still comes through even after they're made into dessert. I've seen bread puddings made many different ways, but since neither my husband nor I prefer raisins in our bread puddings, my recipe has them listed as optional. If you prefer yours with raisins, add them in during the whisking of the eggs & milk step. Also, if you prefer your brown sugar sauce to be differently -ahem- sauced, you can substitute whiskey or bourbon for the amaretto in the sauce recipe. :)
Ingredients:
Pudding -
1 loaf Challah bread
6 egg yolks
2 whole eggs
1 C sugar
4 C milk, warmed
1 tsp salt
1 tsp ground nutmeg
½ tsp cinnamon
2 Tbsp vanilla
2 Tbsp amaretto liqueur
4 Tbsp butter, melted
½ cup raisins (optional)
Brown Sugar Sauce -
8 Tbsp butter (1 stick)
1½ C brown sugar, packed
½ tsp salt
1 tsp vanilla
½ C water
2 Tbsp amaretto liqueur (optional)
Directions:
Preheat oven to 350°F. Make sure rack is set in the middle of the oven as much as possible. Cut up challah bread into rough cubes, about 1x1"; does not have to be exact, but uniformity is the key. Place cubed bread into 9x13" glass pan and set aside.
In a large bowl, whisk together warmed milk (should not be super-hot, but should be warmer than room temp) with egg yolks, eggs, sugar, salt and spices. Add vanilla and amaretto. Gradually add melted butter.
Pour mixture over cubed bread, making sure that each cube is moistened. If you miss some when pouring from the bowl, you can go back and submerge them using a spoon. Make sure there are NO dry cubes, every piece should be soaked and softened with the liquid.
Place in oven and bake for 50 minutes, or until the center is no longer liquid-y in appearance. (May take as long as an hour, depending on your oven.)
While pudding is baking, create the brown sugar sauce. Combine ingredients into a small saucepan set to medium-high to high heat. Stir vigorously to keep brown sugar from burning. Once sauce comes to a rolling, foaming boil, remove from heat or turn down to lowest setting. Cover and set aside.
When pudding is done, cool for at least 15 minutes. Cut and divide into square pieces. Pour sauce over individual bread pudding portions immediately before serving. Can also be served a la mode (with a scoop of vanilla ice cream), but I find that to be just a *little* too rich for my taste. ;)
Makes 12-18 servings.
~~~~~~
GBAdams
11/10/2011
I've always loved egg breads, and of course, when thinking about making a bread pudding, the quintessential egg bread -challah- should always be considered. You can, of course, make this bread pudding with regular bread such as French or Italian, but I like how the pre-pudding shininess of egg breads still comes through even after they're made into dessert. I've seen bread puddings made many different ways, but since neither my husband nor I prefer raisins in our bread puddings, my recipe has them listed as optional. If you prefer yours with raisins, add them in during the whisking of the eggs & milk step. Also, if you prefer your brown sugar sauce to be differently -ahem- sauced, you can substitute whiskey or bourbon for the amaretto in the sauce recipe. :)
Ingredients:
Pudding -
1 loaf Challah bread
6 egg yolks
2 whole eggs
1 C sugar
4 C milk, warmed
1 tsp salt
1 tsp ground nutmeg
½ tsp cinnamon
2 Tbsp vanilla
2 Tbsp amaretto liqueur
4 Tbsp butter, melted
½ cup raisins (optional)
Brown Sugar Sauce -
8 Tbsp butter (1 stick)
1½ C brown sugar, packed
½ tsp salt
1 tsp vanilla
½ C water
2 Tbsp amaretto liqueur (optional)
Directions:
Preheat oven to 350°F. Make sure rack is set in the middle of the oven as much as possible. Cut up challah bread into rough cubes, about 1x1"; does not have to be exact, but uniformity is the key. Place cubed bread into 9x13" glass pan and set aside.
In a large bowl, whisk together warmed milk (should not be super-hot, but should be warmer than room temp) with egg yolks, eggs, sugar, salt and spices. Add vanilla and amaretto. Gradually add melted butter.
Pour mixture over cubed bread, making sure that each cube is moistened. If you miss some when pouring from the bowl, you can go back and submerge them using a spoon. Make sure there are NO dry cubes, every piece should be soaked and softened with the liquid.
Place in oven and bake for 50 minutes, or until the center is no longer liquid-y in appearance. (May take as long as an hour, depending on your oven.)
While pudding is baking, create the brown sugar sauce. Combine ingredients into a small saucepan set to medium-high to high heat. Stir vigorously to keep brown sugar from burning. Once sauce comes to a rolling, foaming boil, remove from heat or turn down to lowest setting. Cover and set aside.
When pudding is done, cool for at least 15 minutes. Cut and divide into square pieces. Pour sauce over individual bread pudding portions immediately before serving. Can also be served a la mode (with a scoop of vanilla ice cream), but I find that to be just a *little* too rich for my taste. ;)
Makes 12-18 servings.
~~~~~~
GBAdams
11/10/2011
Wednesday, November 2, 2011
Basic (Chinese Sausage) Fried Rice
Here's a basic recipe for my favorite kind of homemade fried rice. It's what I grew up on, and is a formula that I've seen countless times in restaurants. My parents used to make a sort of crepe/omelet with the eggs, remove them, dice them, and then return them to the pan, but that's always been so labor-intensive. And I could never get a flat, thin omelet to cut up. However, in observing how Chinese restaurants cook their food, I started doing it this way. MUCH more efficient. ;)
The key for this dish is to ensure everything is ready ahead of time, so all you have to do is add & stir and keep the food moving. Also, use as high/hot heat as you can stand. (These kinds of foods especially make me yearn for a professional-type high BTU burner. Like 10,000 BTUs. Hee!) As with any kind of stir fry, the key to the crispness & flavor is to get it cooked as fast as possible to sear it all in. Basically, you add ingredients, stir, add, stir, etc., until your dish is done.
Ingredients:
6-8 C cooked, plain sticky rice. (Day-old leftovers work best)
2 C Chinese sausage, diced
3 eggs, slightly beaten
3 C peas (frozen are OK)
3 cloves garlic, finely chopped
1 small onion, diced
1/4 soy sauce (can use reduced-sodium)
3 Tbsp sesame or canola oil
Directions:
In a wok or high-sided skillet, heat pan on high and add oil. Add onion and saute for 2-3 minutes, then add garlic.
When onion has just started to become translucent, add Chinese sausage and continue to stir quickly. Then add the eggs, making sure to vigorously stir so that scrambled eggs don't clump too much and are broken up into small pieces. Once eggs are no longer runny, add peas.
Stir for another 3-4 minutes, then add rice. Drizzle soy sauce over rice, distributing as evenly as possible. Fold rice over and over to incorporate the rest of the ingredients and to ensure even coverage of soy sauce. If there are any big clumps of rice left, this is the time to break them up so they can get covered, too. Continue to stir for another 5-7 minutes, or until fried rice is well incorporated.
Fried rice can be served as a side or as a main course.
~~~~~~
GBAdams
10/29/2011
The key for this dish is to ensure everything is ready ahead of time, so all you have to do is add & stir and keep the food moving. Also, use as high/hot heat as you can stand. (These kinds of foods especially make me yearn for a professional-type high BTU burner. Like 10,000 BTUs. Hee!) As with any kind of stir fry, the key to the crispness & flavor is to get it cooked as fast as possible to sear it all in. Basically, you add ingredients, stir, add, stir, etc., until your dish is done.
| I forgot to capture diced onions & garlic, but they are a part of this. |
6-8 C cooked, plain sticky rice. (Day-old leftovers work best)
2 C Chinese sausage, diced
3 eggs, slightly beaten
3 C peas (frozen are OK)
3 cloves garlic, finely chopped
1 small onion, diced
1/4 soy sauce (can use reduced-sodium)
3 Tbsp sesame or canola oil
| This is Chinese sausage, diced. |
Directions:
In a wok or high-sided skillet, heat pan on high and add oil. Add onion and saute for 2-3 minutes, then add garlic.
When onion has just started to become translucent, add Chinese sausage and continue to stir quickly. Then add the eggs, making sure to vigorously stir so that scrambled eggs don't clump too much and are broken up into small pieces. Once eggs are no longer runny, add peas.
Stir for another 3-4 minutes, then add rice. Drizzle soy sauce over rice, distributing as evenly as possible. Fold rice over and over to incorporate the rest of the ingredients and to ensure even coverage of soy sauce. If there are any big clumps of rice left, this is the time to break them up so they can get covered, too. Continue to stir for another 5-7 minutes, or until fried rice is well incorporated.
Fried rice can be served as a side or as a main course.
~~~~~~
GBAdams
10/29/2011
Wednesday, September 7, 2011
Ma's Styrofoam Cookies
My mother-in-law has been generous over the years on many fronts, but particularly in the kitchen. She has totally helped to round out my cooking education -- she taught me how to properly cook a turkey for Thanksgiving, how to make pumpkin pie WITH homemade crusts (although nowadays I cheat a little and use the pre-made crusts because I have no patience, LOL), how to make pot roast, etc. One of the most delightful culinary things she has taught me is how to make these delicate, delicious cookies. She only made them once a year, around Christmas, and they were coveted by everyone in the family, so most people only got to taste a few from her batch. Then we moved to Colorado, and though she gave me the recipe before we left, it took me years to perfect them due to the high altitude. (Much to my husband's chagrin, as he really started to miss these during the Christmas season.) In doing so, I stumbled onto another culinary tool/ingredient that was previously unknown to me: Cream of Tartar. I think my mom had some in her spice cabinet, but it never got used, so I had no idea what it was for. But now I do. ;)
If you've never worked with Cream of Tartar, know that it is a sour, white powder, used for stabilizing whipped, beaten egg whites (meringue). I'm sure there's probably other uses for it, but that's all I know about its usefulness. Just a note about these cookies: Due to the fact that they're meringue, these cookies don't do well in humid environments. They're ideal for Colorado, since it's sooooo dry up here, but I imagine that if you made these cookies anywhere else with relatively high humidity, they wouldn't last very long (eat them all the same day!), and/or they might not turn out very well.
One last thing - because there is no flour of any kind in this recipe, it is ideal for those who are looking for a gluten-free treat. As long as you're not allergic to nuts... ;)
Ingredients:
2 egg whites
½ tsp Cream of Tartar
½ C sugar
½ C pecan pieces
1 tsp vanilla
Directions:
Pre-heat oven to 250°F. Beat the egg whites on medium-high speed. When they have become frothy, add Cream of Tartar. Continue to beat egg whites until they form stiff peaks.
Add ⅔ of the sugar, beat at least 3 mins longer, or until the whites start to have a shiny, velvety look. Add rest of the sugar, then the vanilla. Continue to beat until sugar and vanilla are fully incorporated.
Remove from mixer and fold in pecan pieces. Drop by rounded teaspoonfuls on parchment paper-lined cookie sheets and bake @ 250°F for 50 minutes.
To see if they're done, pull cookie sheet out most of the way to lift paper to see if it's looking brown, not real white. If they're really done, they should come off paper easily.
Store in an airtight container, away from moisture. Makes approximately 36 cookies.
~~~~~~
GBAdams
12/21/2006
If you've never worked with Cream of Tartar, know that it is a sour, white powder, used for stabilizing whipped, beaten egg whites (meringue). I'm sure there's probably other uses for it, but that's all I know about its usefulness. Just a note about these cookies: Due to the fact that they're meringue, these cookies don't do well in humid environments. They're ideal for Colorado, since it's sooooo dry up here, but I imagine that if you made these cookies anywhere else with relatively high humidity, they wouldn't last very long (eat them all the same day!), and/or they might not turn out very well.
One last thing - because there is no flour of any kind in this recipe, it is ideal for those who are looking for a gluten-free treat. As long as you're not allergic to nuts... ;)
| This is enough ingredients for a batch & a half. |
2 egg whites
½ tsp Cream of Tartar
½ C sugar
½ C pecan pieces
1 tsp vanilla
Directions:
Pre-heat oven to 250°F. Beat the egg whites on medium-high speed. When they have become frothy, add Cream of Tartar. Continue to beat egg whites until they form stiff peaks.
Add ⅔ of the sugar, beat at least 3 mins longer, or until the whites start to have a shiny, velvety look. Add rest of the sugar, then the vanilla. Continue to beat until sugar and vanilla are fully incorporated.
Remove from mixer and fold in pecan pieces. Drop by rounded teaspoonfuls on parchment paper-lined cookie sheets and bake @ 250°F for 50 minutes.
To see if they're done, pull cookie sheet out most of the way to lift paper to see if it's looking brown, not real white. If they're really done, they should come off paper easily.
| What the finished cookie looks like on the inside. ;) |
Store in an airtight container, away from moisture. Makes approximately 36 cookies.
~~~~~~
GBAdams
12/21/2006
Subscribe to:
Posts (Atom)