Showing posts with label gluten-free. Show all posts

Sunday, December 13, 2020

Gluten-Free Potato Pancakes


Gluten-Free Potato Pancakes

Here's a basic recipe for potato pancakes, with a gluten-free twist. :) 


Ingredients:

  • 4 large potatoes (or 2 1-lb bags of pre-shredded potatoes)
  • 1 small onion (white, yellow, vidalia, whatever floats your boat)
  • 1 large egg, beaten
  • 1 tsp salt
  • ¼ tsp white pepper
  • 4 Tbsp rice flour
  • 1 tsp paprika
  • 1-2 C of vegetable oil, enough to cover a skillet or frying pan ~1 inch deep
  • sour cream and/or applesauce for condiments
  • sliced green onions, for garnish

Directions:

  1. Peel and shred potatoes. Drain/squeeze out any excess liquid. Set aside.
  2. Finely dice the onion. Make the pieces as small as possible. Add to the potatoes.


  3. Add egg, salt, pepper, paprika, and rice flour. Mix well. I find the best way is to roll up your sleeves and mush together with your hands to ensure that it is all thoroughly incorporated.


  4. Heat oil in skillet on high. When oil is ready, form a potato ball, slightly smaller than baseball-sized, and then gently flatten until pancake is about ¾-1" thick. Be sure not to flatten too fast so that there are large cracks or gaps in the pancake. If this happens, gently press back together so that the pancake is whole and round. Gently drop into the oil by first dipping one side and then letting the rest slide off your hand into the pan. Be careful not to let your fingers touch the scalding hot oil in the process.


  5. Fry about 5 minutes, or until you can see that the edges are turning golden brown. Gently flip and repeat. I find it easier to flip items such as this in hot oil by using 2 tools (a spatula and a slotted spoon, for example) so that the pancake doesn't flip over too fast and splash hot oil everywhere.


  6. When both sides are golden brown and crispy, remove from oil and drain on paper towels or on a grate. 


  7. Garnish with green onions and serve with sour cream and/or applesauce.


Makes 12 pancakes (serves 4-6 people)

~~~~~~

GBAdams

12/13/2020


Monday, December 10, 2012

Roasted Butternut Squash & Bacon Soup


Roasted Butternut Squash & Bacon Soup
This is a soup that took me 2 tries to get it right.  My first attempt was below pathetic--the soup was watery and thin, and it was definitely not pureed enough.  I also was highly dissatisfied with the flavor.  When I posted about this on Facebook, many of my friends offered their suggestions, one of which was adding cream cheese to the soup, something I admit I hadn't even considered.  I shelved that suggestion to the back of my mind for the next time I would try to make this soup.  After catching a cooking show where they roasted an acorn squash with shallots and garlic inside, I was inspired to try again. So here is a record of that second attempt.  It turned out way BEYOND my expectations.  Let's just say the way my house smelled while the squash was roasting was nothing compared to how well this soup turned out.  I loved how the roasting brought out the sweetness of the butternut squash without adding any sugar whatsoever to the mix.  And, need I say it, the bacon improved the recipe on the whole to a level I could not have imagined.  Bacon really does make everything better! LOL. I hope you enjoy this soup as much as me & my family did...


Ingredients:
1 whole butternut squash
8 slices of thick-cut bacon
8-10 whole, peeled cloves of garlic (do not chop)
4-5 peeled shallots
2-3 Tbsp olive oil (I prefer the light-tasting variety to extra-virgin)
4 C Chicken broth
1 pkg (8 oz) cream cheese (can use reduced-fat)
1-2 Tbsp kosher salt, depending on taste
1 tsp coarse ground black pepper
1/2 C shredded cheese for garnish, such as swiss or gruyere
Chopped parsley, also for garnish (can be dried)

Squash, bacon, shallots and garlic, ready for the oven
Directions:

Preheat oven to 425°F. Roughly dice bacon slices; set aside.  Slice shallots and set those aside.  Peel & chop de-seeded butternut squash into small, roughly 1-in cubes. Make sure cubes are somewhat equal in size so they roast evenly.  In a large bowl, combine squash, bacon, garlic and shallots. Add olive oil, salt and pepper to taste. When entire mixture is seasoned, pour and evenly distribute onto large, flat, shallow pan, such as a 1/2 jelly roll sheet.  Roast in the oven for 45 minutes, or until the squash has started to brown on the edges and the bacon has mostly crisped up. Remove from oven.  Set aside a few browned shallots rings and bacon bits to reserve as garnish for serving and let the rest cool.


In a large saucepot, bring chicken broth up to a simmer on medium-high to high heat. While broth is heating up, place entire contents of roasting pan into a food processor and purée until all the pieces have been puréed relatively well.  (There might still be little bacon bits visibly floating throughout purée; this is ok.)

Roasted squash mixture, puréed in a food processor.
Add purée to chicken broth and stir well; a whisk is recommended.  Lower heat to medium and add cream cheese.  Whisk further until cream cheese is well incorporated. Remove from heat.


Ladel soup into bowls.  Garnish with crisped shallots & bacon; can add shredded cheese as well.


Makes 4-6 servings

~~~~~
GBAdams
12/09/2012

Sunday, April 22, 2012

Cheesy Hash Browns


Here's a really easy, cheesy hash brown recipe that I made up as I went along.  Adjust the spices to your taste...ours was on the warm-ish side without being too hot.  The Worcestershire also adds a flavor dimension that is not normally present in regular, ordinary hash browns.  Quite tasty, and I was really happy with the outcome.  Added bonus - since I don't use any flour in this recipe, it is definitely gluten-free.  :)

Enjoy!  :)


Hash Browns

Ingredients:
1 20-oz pkg of shredded hash brown potatoes
2 C shredded cheddar cheese (or whatever blend you prefer)
1 C milk
1 Tbsp garlic powder
1 Tbsp onion powder
¼ tsp white pepper
½ tsp black pepper
1 tsp salt
1 tsp paprika
1 tsp Worcestershire sauce


Directions:
Preheat oven to 425° F.  In a bowl, combine spices, milk, and Worcestershire sauce.  Add potatoes and cheese and combine well.  (Potatoes will absorb much of the liquid.)  Spray the bottom and sides of an 8x8 glass baking dish with cooking spray.  Spread potato mix evenly into glass dish. Place on the lowest rack of the pre-heated oven. Bake for 30 minutes at 425°, or until top is golden brown & bubbly.

The potato mix, ready to go into the oven...

...and afterward, all golden bubbly.  :)


Shot of the hashbrowns, taken with my camera phone, after we dove in. ;)

Makes 8-10 servings.

~~~~~~
GBAdams
04/22/2012


Monday, March 26, 2012

Hash Benedict


Here's an alternative to regular Eggs Benedict.  For me, it's easier to time the overall presentation than the traditional way, since I don't have to worry about the english muffins getting overly-toasted, dry, etc.  And for our 2-year old, it's a lot easier to eat, thanks to the hash browns.


Ingredients:
1 pkg shredded potatoes (hash browns)
6 eggs
1 pkg Hollandaise sauce mix
boiling water
2-3 Tbsp vinegar
Canadian bacon (optional)


Directions:
Prepare Hollandaise sauce according to package directions. To make it from scratch, here's a recommended recipe.  Set aside on low heat to keep warm.  Brown potatoes in a frying pan or skillet; use 1 Tbsp canola oil and 1 tbsp butter, or whatever oil desired to keep potatoes from sticking to the pan.  Once potatoes are brown, also set aside on low heat to keep warm.

Prepare poached eggs.  Now that I know how to make them in the microwave, that's the technique I use.  (So easy! Thank you, Foodess!)  You can also learn how to do them the classic way, following these instructions if you've never poached eggs before.  Assemble everything together by layering hash browns on a plate, placing 1-2 poached eggs on top, and smothering with hollandaise sauce. (If adding Canadian bacon is desired, place on the potatoes before placing eggs.)


Makes 4-6 servings.

~~~~~
GBAdams
03/25/2012

Friday, March 23, 2012

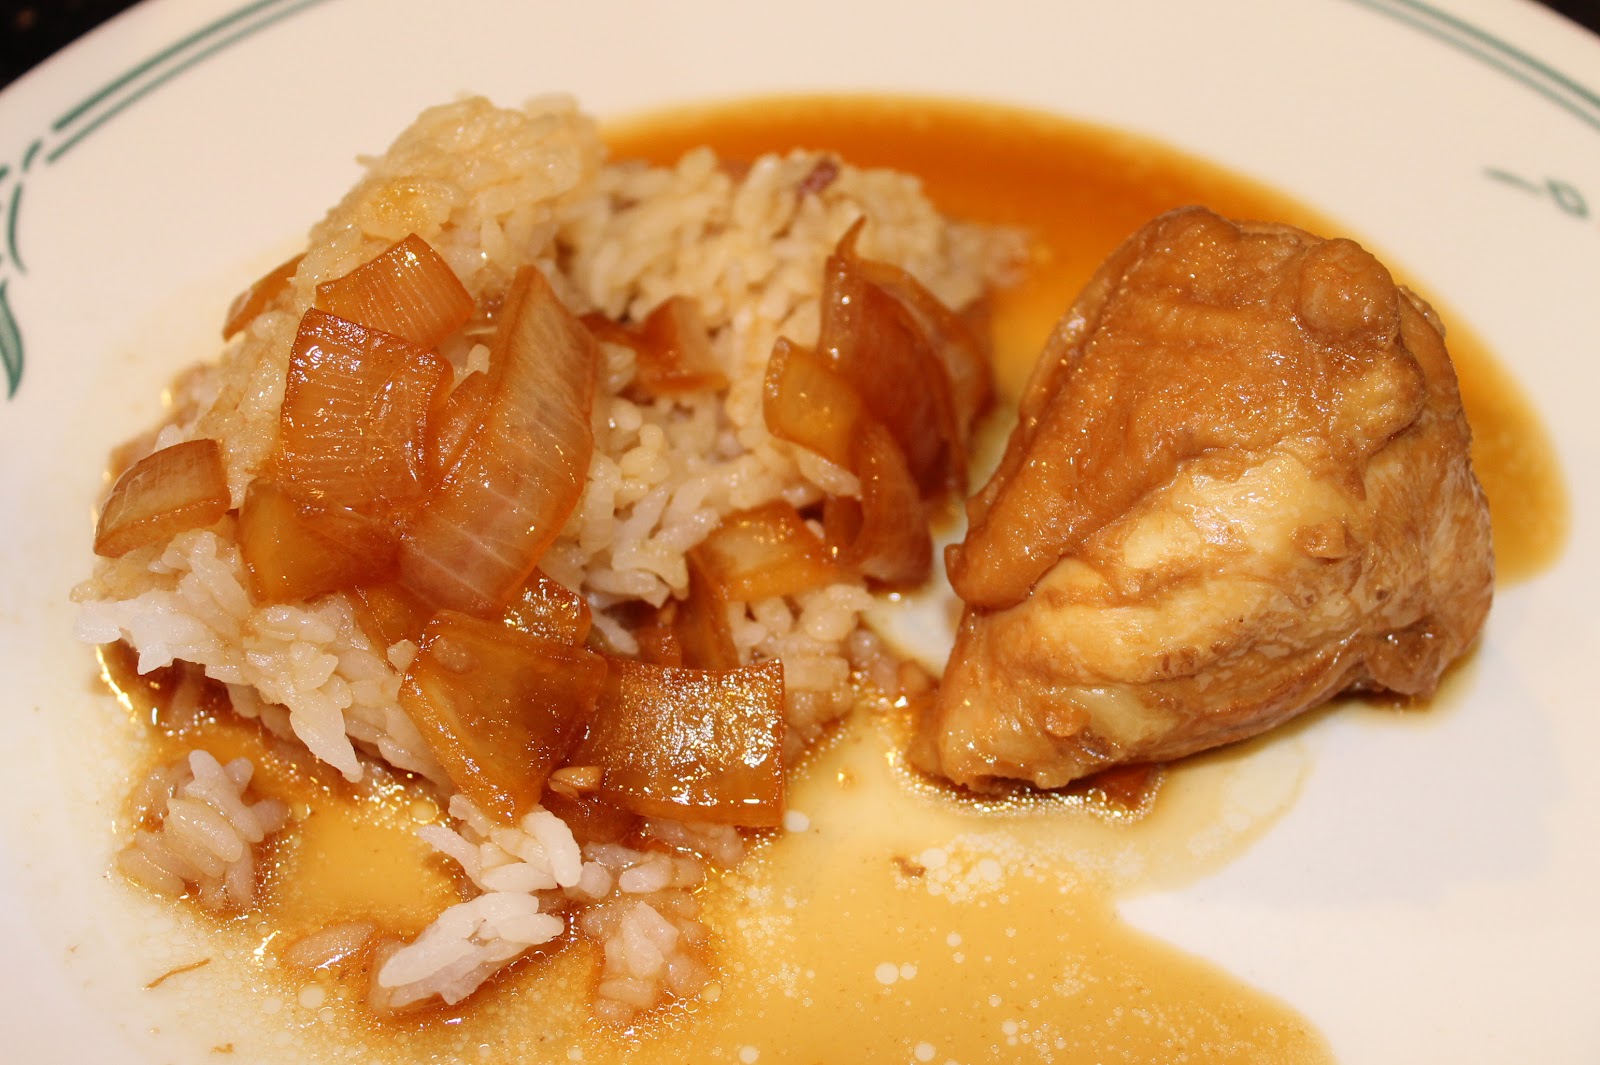
Chicken Adobo by Germ

So here is yet another recipe I thought I had already posted on Mélange, but it turns out I was wrong.  I did publish it as a note on my Facebook page, but forgot to replicate it to my blog, once it was created.  Oops!

Filipino Adobo, unofficially known as the national dish of the Philippines, has its roots in Spanish cuisine, but its preparation and flavor is entirely Filipino. Although it also shares a name with some Mexican dishes, they are not the same by any stretch.

This is by no means the only way to cook The Philippines' national dish; this is just how I've prepared it since I was in college. There are so many varieties based on region and preference. Some more spicy, some with more savory elements (like fresh herbs, etc.). However, all share two main, basic ingredients: soy sauce and vinegar. It's the vinegar that sets this dish apart and gives it its unique flavor. I make it with sugar so it ends up a sort of adobo/sweet-and-sour hybrid. Very popular at pot lucks.  You can modify it according to your own tastes, either using less sugar or omitting it altogether.  Just don't take out the vinegar.  ;)


Ingredients:
1 whole fryer chicken, cut up (about 8-10 pieces, depending if you cut up the split chicken breasts)
4-5 cloves garlic, chopped
2-3 white onions, roughly chopped - larger slices
1 Tbsp peppercorns
3-4 Bay leaves
2 Tbsp sesame oil (or enough to barely coat bottom of pan or pot)
1 C soy sauce (use gluten-free variety to make this a GF dish)
1 C apple cider vinegar
1 C sugar
1 C warm water
White sticky rice

Directions:
In mixing bowl or large measuring cup, combine soy sauce, vinegar, sugar and water. Set aside.  In stock pot or dutch oven, heat to medium high, add sesame oil, then add chicken.  Brown one side.  Flip, then add garlic and continue to brown other side.  Add onions, soy sauce mixture, peppercorns and bay leaves.  Bring liquid to a boil, then reduce heat to simmer for a minimum of 15 minutes, or until onions begin to turn translucent.  Serve with rice.


Serves 6-8.

~~~~~~
GBAdams
03/08/2010

Monday, September 12, 2011

Panko-Pecan Rainbow Trout

Ingredients:
1 C Panko bread crumbs (potato flakes can be substituted for gluten-free option)
½ tsp paprika
1 tsp thyme
1 tsp parsley flakes
1 tsp garlic powder
1 tsp kosher salt
1/3 C pecan chips

Prep:
- Use on 2 small-med rainbow trout, de-boned, head and tail removed, and skin on, or 3-4 3oz tilapia filets.
- Apply to moistened (not battered) fish on the flesh side (do not apply on the skin). If using tilapia, cover both sides.
- Once breading is applied, moisten breading with a spray bottle filled with water. Then lightly press into fish using waxed or parchment paper.

Directions:
Heat 2-3 Tbsp canola oil and 1 Tbsp butter in a large skillet on med-high heat.  (The butter helps to brown the fish & breading nicely.) Place the trout, skin-side down into pan.  Cook for about 7-9 minutes, then flip. (You may need to use 2 spatulas to accomplish this.)  Reduce heat to medium and brown the breaded side for another 7 minutes or so.  Fish is done when flesh is firm and flakes easily. Serve with vegetables.

Serves 2-3.

~~~~~~
GAdams
03/09/11

Wednesday, September 7, 2011

Ma's Styrofoam Cookies

My mother-in-law has been generous over the years on many fronts, but particularly in the kitchen.  She has totally helped to round out my cooking education -- she taught me how to properly cook a turkey for Thanksgiving, how to make pumpkin pie WITH homemade crusts (although nowadays I cheat a little and use the pre-made crusts because I have no patience, LOL), how to make pot roast, etc.  One of the most delightful culinary things she has taught me is how to make these delicate, delicious cookies.  She only made them once a year, around Christmas, and they were coveted by everyone in the family, so most people only got to taste a few from her batch.  Then we moved to Colorado, and though she gave me the recipe before we left, it took me years to perfect them due to the high altitude.  (Much to my husband's chagrin, as he really started to miss these during the Christmas season.)  In doing so, I stumbled onto another culinary tool/ingredient that was previously unknown to me: Cream of Tartar.  I think my mom had some in her spice cabinet, but it never got used, so I had no idea what it was for.  But now I do.  ;)


If you've never worked with Cream of Tartar, know that it is a sour, white powder, used for stabilizing whipped, beaten egg whites (meringue).  I'm sure there's probably other uses for it, but that's all I know about its usefulness.  Just a note about these cookies: Due to the fact that they're meringue, these cookies don't do well in humid environments.  They're ideal for Colorado, since it's sooooo dry up here, but I imagine that if you made these cookies anywhere else with relatively high humidity, they wouldn't last very long (eat them all the same day!), and/or they might not turn out very well. 

One last thing - because there is no flour of any kind in this recipe, it is ideal for those who are looking for a gluten-free treat.  As long as you're not allergic to nuts...  ;)


This is enough ingredients for a batch & a half.
Ingredients:
2 egg whites
½ tsp Cream of Tartar
½ C sugar
½ C pecan pieces
1 tsp vanilla


Directions:
Pre-heat oven to 250°F. Beat the egg whites on medium-high speed.  When they have become frothy, add Cream of Tartar.  Continue to beat egg whites until they form stiff peaks. 


Add ⅔ of the sugar, beat at least 3 mins longer, or until the whites start to have a shiny, velvety look.  Add rest of the sugar, then the vanilla.  Continue to beat until sugar and vanilla are fully incorporated. 


Remove from mixer and fold in pecan pieces.  Drop by rounded teaspoonfuls on parchment paper-lined cookie sheets and bake @ 250°F for 50 minutes. 


To see if they're done, pull cookie sheet out most of the way to lift paper to see if it's looking brown, not real white.  If they're really done, they should come off paper easily.


What the finished cookie looks like on the inside. ;)


Store in an airtight container, away from moisture. Makes approximately 36 cookies.

~~~~~~
GBAdams
12/21/2006