Thursday, November 21, 2013

Homemade French Onion Soup


This is one of my favorite things to make on a cold & snowy day...especially in the crock pot.  The house is FILLED with the delicious aroma of beef broth and onions, and it makes anyone who walks into our house instantly hungry.  (Hee hee!) This is not a difficult recipe, just time-intensive, especially since you'll want it to cook for as long as possible in order for the flavors to meld perfectly.  ;)

I hope you like it...


Ingredients:
2-3 medium white onions
52 oz (2-26 oz containers) Beef Cooking stock
3 Tbsp Worcestershire sauce
1 Tbsp soy sauce
½ tsp course ground black pepper
1 to 1½ Tbsp Kosher salt, depending on taste
4 C water
1 loaf French Bread
2-3 C shredded Gruyere cheese
2-3 C shredded Swiss cheese
6-8 slices of Swiss cheese

Advanced Preparation:
Preheat oven to 375°F.  Cut French bread loaf into 1-in slices.  Toast 4-6 slices (depending on thickness of the bread) in pre-heated oven for 10-15 minutes, or until golden brown.  Remove and set aside.

Soup Directions:
Chop onions into even quarter slices. Place in a medium to large sauce pan.  Add stock, Worcestershire sauce, soy sauce, pepper, salt, and water.  Heat on high.  When liquid comes to a boil, cover.  Turn heat down to medium-high and let simmer for 1-2 hours. After 1 hour, you will need to add 1-2 C more water, depending on evaporation rate.  Heat soup until onions are no longer firm but are translucent and limp. Remove from heat.

Preheat oven to 425°F.  In 2 large oven- and broiler-safe ceramic bowls, place 2-3 slices toasted French bread slices. Ladle soup over slices, filling about ¾ full. add 1 C shredded Swiss, then 1 C shredded Gruyere, add one more ladle of soup, then top off with 3-4 Swiss slices, ensuring top is completely covered.  Place bowls on jelly roll pan or some other pan with shallow sides, then place pan in pre-heated oven.  Let bake for 10 minutes, then turn broiler on low. Broil for 5 more minutes, or until cheese top is bubbly and turns a golden brown. Remove from oven; let stand 5 minutes, then serve.  Be careful, as soup will be EXTREMELY hot.


*This soup can also be made in a slow cooker. Add all ingredients into pot, cover, and set temp to high.  Let cook 6-8 hours.  Follow the rest of the directions for placing in bowls.

Serves 3-4 people

~~~~~~
GBAdams
10/31/2012

Thursday, July 4, 2013

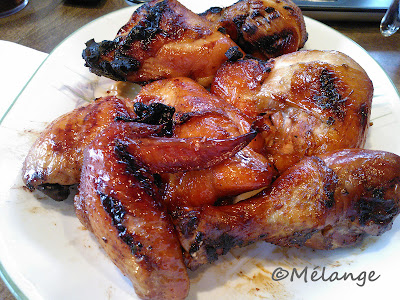
Vietnamese-style Grilled Chili-Lime Wings


This is one of those dishes that try my patience.  Not because it's hard to make, but because it's easy.  Easy to prepare, easy to marinate, easy to ruin.  The high sugar content of this dish, due to both the honey and the brown sugar, lends itself to burning quite easily if you're not careful or impatient.  Therefore, don't try to force the chicken to be done right quickly, or you're liable to end up with charred skin on the outside and raw poultry on the inside.  The key to this is to cook it slowly, over indirect heat.  And to pack some patience in your back pocket, because this should be marinated overnight, and takes about an hour to cook.  But if you do it right, you will be in heaven.  ;)


Ingredients:
Marinade --
1 C lime juice
2 C soy sauce
¼ C Thai chili sauce (NOT the same as Sriracha ... this is sweeter and not as hot)
½ C honey
1-2 Tbsp garlic (3-4 cloves), finely chopped
¾ C brown sugar
2 Tbsp fish sauce
2 Tbsp sesame oil
Approx. 20 wings, cut up into sections (can also use a whole fryer chicken)

Finishing/Dipping Sauce --
1½ C warm water
½ C sugar
2 Tbsp Thai chili sauce
2-3 Tbsp fish sauce

Directions:
Whisk all the ingredients for the dipping sauce together.  Pour into an air-tight container and set aside.

Whisk all the liquid ingredients for the marinade except the honey together.  Warm the honey in the microwave about 30 seconds, then add to the rest of the marinade and whisk well until fully incorporated.  Immerse wings (or chicken pieces) in the marinade overnight in an airtight container, turning over once after at least 6 hours and at least 4 hours before cooking time.


Preheat grill.  If using a gas grill, turn on all burners on high so that it gets nice and hot inside.  If using charcoal, use a large amount so that it gets really hot.  When grill is ready, move charcoal to one side, or turn off one set of burners on a gas grill.  Place wings on the side that no longer has direct heat.


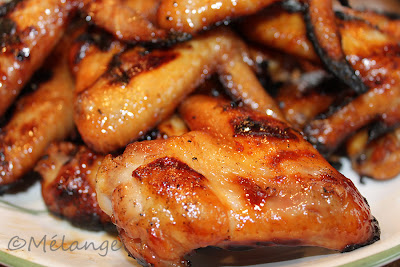
Cover.  Let cook for 20 minutes, then flip and cook for another 25 minutes.  Be sure heat is an even temperature and does not cool off too much, or else it will take even longer to cook.  After the 45 minutes are up, wings (or chicken pieces) should be a nice caramel-brown color.  If there's still some pink in the chicken, flip and keep on the heat another 5-10 minutes. Place the wings over the side with the heat, 4-5 minutes, then flip and continue another 4-5 minutes.  Do not let the chicken burn, which is easy to do thanks to the high sugar content.


How a whole fryer looks after marinating and grilling.

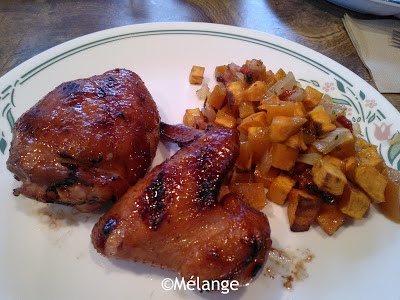
Remove wings (or chicken) from heat and serve with the finishing sauce for dipping.  Ideal with grilled or roasted vegetables, plain rice or noodles.

Served with a side of roasted sweet potatoes with diced onions and bacon.

Mmm...mmm...tasty!

Serves 5-6 people (depending on how hungry they are!)  ;)

~~~~~~
GBAdams
06/05/2013

Wednesday, January 23, 2013

Crock Pot Beef Stroganoff


This is a crock pot recipe I thought up in my head one day, but based on a recipe my mother-in-law gave me. Most beef Stroganoff recipes call for the incorporation of sour cream....which is fine when you're cooking for a shorter time on a stove top. However, since this was to be cooking all day, using sour cream might not have worked too well, since there was a risk it might break down & separate. So instead, I chose to substitute cream cheese into that role.  I loooove crock pot recipes - they can be prepped the night before and plugged in the next morning on your way out the door to go to work. Then when you come home after a long day, voilá! The house smells amazing, and you have a home-cooked meal waiting for you without having to do hardly a thing.  Win-win!  :)

A few things to note about this recipe -

  1. I have a 5-qt crock pot, so I can't really make small recipes if they're going to be cooking in the slow cooker all day, or else I risk damaging my appliance.  So this is a big recipe.  But...the good news is, you can cut this recipe in half, especially if you have a smaller pot, like 4 quarts.
  2. If you don't like mushrooms, you can skip them, but you'll need to compensate for the liquid, since the mushrooms add a good portion of the moisture in this recipe.  I suggest adding 2 more cups of beef broth to make up for it.
  3. You can find beef stew meat in nearly any meat case in any grocery store.  They're usually the scraps of meat left over from other, higher-quality cuts.  If trimmed properly, and then cooked in this manner (read: all day), you won't be able to tell the difference between the scraps and the prime rib.  ;)
  4. The layer order you see in the pictures is different than what I recommend below.  This is because when I made this dish, I mistakenly put the noodles on top.  Then as the day wore on and the mushrooms released their liquid and cooked down, the noodles remained on top, floating above it all. So they stayed rather stiff and never really got cooked until my husband was kind enough to stir the whole pot for me.  He moved the noodles down to the bottom and gave it a chance to soak up the juices.  So that's why I recommend putting them at or near the bottom of the pot, rather than how I show it. (Do as I say, not as I do...)  ;)
  5. I should have broken up the cream cheese into smaller chunks when I made this recipe, as it would have melted and incorporated better into the sauce.  So in my pictures you will see a solid block of cream cheese.  Don't do that...cut it up and spread throughout the pot.  You'll be glad later, when you have to stir the whole thing into itself.
  6. If you want to make this recipe gluten-free, make sure you use the Lea & Perrins brand of Worcestershire sauce, as it is labeled as definitely GF.  Then substitute the flat egg noddles with your choice of GF pasta.
  7. Using pre-cut veggies will help cut down on your prep time.  Take advantage of these items, unless you REALLY like cutting up your own vegetables.  ;)


Ingredients:
2 lbs (approximately) Beef Stew meat
1 C diced onions, white or yellow
2-3 cloves garlic, finely diced
2 C (16 oz) sliced white mushrooms
52 oz (two 26-oz containers) beef stock
1 C water
16 oz (2 bricks) low fat cream cheese, cut into cubes
2 packages brown gravy mix
2 Tbsp Worcestershire sauce (for GF, use Lea & Perrins brand)
2-3 Tbsp garlic powder
2 tsp coarsely ground black pepper
1-2 Tbsp coarse Kosher salt (or to taste)
1 bag flat egg noodles (GF noodles can be substituted)


Directions:
Trim meat to get rid of any excessive fat.  (Don't cut all of it away; a small amount is necessary for flavor, but most of it can be thrown out.)  Cut meat so that they're as evenly-sized as possible; 1-in cubes or less.  If your crock pot is not the kind that can go from stove top to base, then brown beef in a deep fry pan.  To brown: heat pan on high until it is as hot as possible.  Add beef and season with salt, garlic powder, and black pepper.  (If needed, add a tablespoon of canola oil to keep beef from sticking to the pan.)


Stir quickly and vigorously so that it sears and browns on the outside but does not cook all the way through.  When most of the pink is no longer visible, remove from heat and set aside to cool for a few minutes.


Add water to the bottom of the crock pot, then lay down noodles.  Place meat over the top of the noodles, then add garlic, onions, cubed cream cheese, gravy mix, and finally mushrooms.  Add Worcestershire sauce. Pour beef broth evenly over contents of entire pot.


Cover, then set temperature to high and let cook for 8-10 hours, stirring once after 5-6 hours.  When ready to serve, turn heat off and stir well, so that sauce is evenly incorporated.  Ladle onto plates and garnish with herbs, such as parsley.


Makes 10-12 servings

~~~~~
GBAdams
01/18/2013

Wednesday, January 2, 2013

Caramel Pull-Apart Breakfast Bread


Here's a recipe I only glimpsed at on Pinterest.  It didn't even occur to me to pin it.  What was I thinking??  I did think it was a neat idea, but didn't take the time to look at the full text of the recipe.  I really should have, as my first attempt ended with less than stellar results. Then, after doing a little research, I realized I needed a liquid component in order for the brown sugar to caramelize.  The recipe I did manage to find said to use basic pancake syrup, but in my opinion, that would have produced such a strong flavor that would have detracted from what I was ultimately trying to achieve.  Since I already have a recipe for a brown sugar sauce topping (which should be made far enough ahead of time that it can cool completely, even the day before), I thought I'd try that and see how that worked.  Bingo! Out came one of the best caramel toppings I've made yet.  :)  Woohoo.  You can even use a little more than I've indicated here, depending on how gooey & sweet you want it to be.  Also, the nuts are totally optional, but when I added them, it made a HUGE difference for the better, so I highly recommend adding pecans, if you can.  One thing I should add is that the first time I made it with the caramel sauce, we were on vacation up in Breckenridge, and with the exception of the Bundt pan, I was using the cooking utensils that were provided with the hotel room.  (It had a full kitchen.)  So that should tell you how easy this recipe is to make.  :)

With the exception of my first attempt, my family really enjoyed all the subsequent attempts of this bread.  My 3-year-old especially loved the ooey-gooey caramel sauce.  Big surprise. LOL.  I hope you enjoy this recipe as much as they did...  :)


Ingredients:
Make ahead: Brown Sugar Sauce Topping

1 can Pillsbury Grands Flaky Layers (or similar)
& ¼ Cups Brown Sugar Sauce
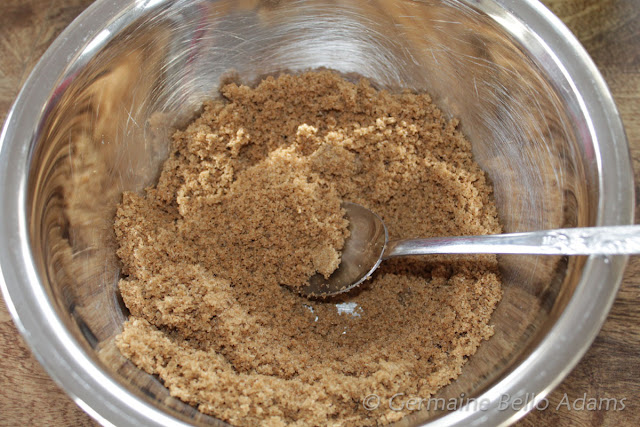
½ C brown sugar, packed
½ tsp cinnamon
¼ tsp salt
½ C chopped pecans (optional)
1-2 Tbsp super-thinly sliced butter


Directions:
Preheat oven to 325°F.  Generously spray the bottom third of a Bundt pan with cooking spray. Spread the thinly-sliced butter throughout the bottom.  Evenly pour  of the brown sugar sauce into the pan, and add half of the pecans (optional).  Set aside.


Combine brown sugar, cinnamon, and salt.


Open biscuit can, separate individual biscuits.  Thoroughly roll & cover each biscuit all over in brown sugar mix and then layer, staggered, at the bottom of the Bundt pan.


Add remainder of pecans (if desired) and use some of the remaining brown sugar mix to spread over the top of the biscuits.  Drizzle the rest of the brown sugar sauce over the entire pan.


Place in pre-heated oven and bake for approximately 30 minutes, or until top of the biscuits are deep golden brown.


Remove from oven and let cool 5 minutes.  Invert pan over a large plate, tapping several times to loosen the biscuits. (Be careful, hot caramel can stick and give you severe burns.)  If necessary, use a fork to help loosen biscuits from the pan.  Let sit for at least 5 minutes before serving.


This is how the bread looks without nuts. It was my first attempt using the brown sugar sauce.


Makes 8 servings.

~~~~~
GBAdams
12/29/2012